

How to Install Picture Frame Hanging Hardware
Quick answer
Installing picture frame hanging hardware follows the same five steps regardless of type: (1) choose hardware rated for the frame's weight and your wall, (2) attach it to the back of the frame, (3) mark your hanging height with the center of the artwork at 57 to 60 inches, (4) install the wall fixing (a stud screw for heavy frames, a rated anchor for drywall), and (5) hang and level. The hardware itself differs by job. D-rings mount on both sides of the frame back about one-third down from the top, with braided wire strung between them so the taut wire sits 2 to 3 inches below the top edge; two D-rings on two wall hooks keep the frame level over time. Sawtooth hangers nail to the top center and suit only lightweight frames on a single point. French cleats use two interlocking beveled rails, the wall rail screwed into studs, to carry heavy or oversized frames and self-level along the bevel. Security T-locks resist theft in public spaces. As a selection rule: frames under 10 pounds tolerate any type, frames over 20 pounds need French cleats or D-rings driven into studs rather than sawtooth in drywall.
Installing Picture Frame Hanging Hardware: The Hardware That Actually Holds
New to hanging pictures? Start with our complete how-to-hang-a-picture guide for the eye-level rule, hardware tier chart, and step-by-step process. This page is the deep-dive on installing the hardware itself.
Most picture frames fall off the wall because the wrong hardware was used for the weight. Here is how to choose, and how to install, the hardware that holds for the long haul.
The hardware on the back of a picture frame holds it on the wall. Wrong hardware leads to crooked frames, frames that fall, or wall damage during installation. The right hardware is invisible from the front and makes the frame easy to hang straight on the first try.
This guide covers the four most common hanging systems for picture frames, when each is right, and how to install them correctly.
Picture Frame Hanging Hardware Installation Guide
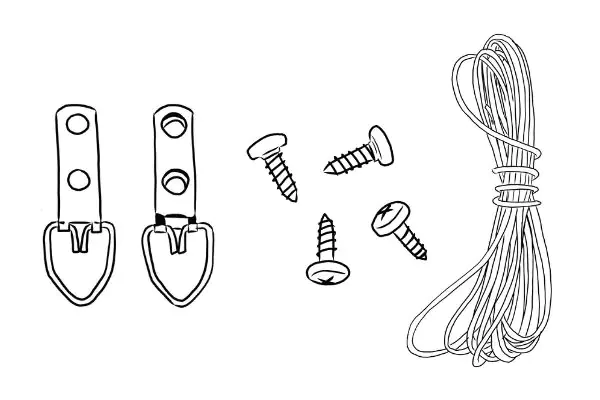
D-rings with picture wire. The most common system. Two D-shaped metal rings are screwed into the back of the frame, one on each side. A length of picture wire is threaded between them. The wire hangs over a wall hook, hanger, or nail. Used for almost any frame from 8x10 up to about 30x40.
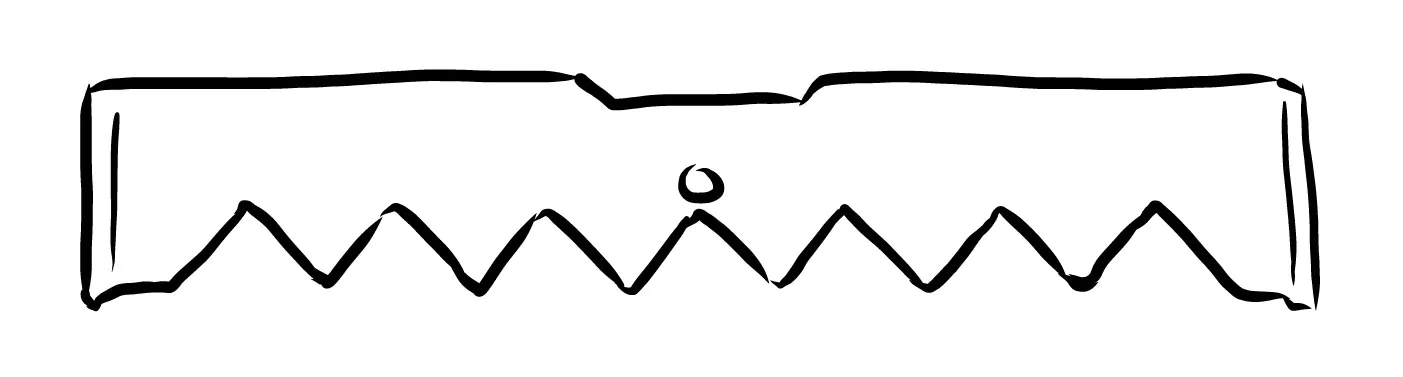
Sawtooth hangers. A small metal strip with a series of teeth, screwed into the top center of the frame back. The frame hangs over a single nail or picture hook. Best for small to medium frames (under 16x20) where the customer wants the simplest possible mounting.
Two-point hangers (also called keyhole hangers). Two slots cut into the back of the frame, designed to fit over two nails or screws spaced precisely apart. Used for heavier frames or for larger frames where a single point of suspension would let the frame tilt.
French cleats. A two-piece system: one half is mounted to the wall, the other half is mounted to the back of the frame. The two halves interlock when the frame is hung. Used for heavy frames (over 25 pounds), shadow boxes, and any frame that needs to sit flush against the wall without tilting forward.
For frames over 25 pounds (most jersey shadow boxes, large canvas frames, oversized memorabilia displays), French cleats are the safest choice. For everything else, D-rings with picture wire is the standard.
When to use each
| Frame size and weight | Recommended hardware |
|---|---|
| Small frames (5x7, 8x10), under 5 lbs | Sawtooth hanger |
| Medium frames (11x14, 16x20), 5 to 15 lbs | D-rings with picture wire |
| Larger frames (16x20 to 24x30), 15 to 25 lbs | D-rings with picture wire (heavy duty) |
| Large frames (24x30+), 25 to 50 lbs | Two-point hangers or D-rings with heavy-duty wire |
| Oversized frames (30x40+), shadow boxes, canvas | French cleats |
| Mirror-style frames where flush mounting matters | French cleats |
The weight of the frame determines the hardware rating. Add up: frame weight, glazing weight, mat board weight, mounting board weight, artwork weight. Round up. Choose hardware rated for at least 1.5 times the total.
Installing D-rings with picture wire
D-ring hardware (also known as wood frame hangers, strap hangers, or mirror hangers) is the standard for most picture frames. Two D-rings get screwed into the back, picture wire threads between them, and the wire hangs over a wall hook. The setup is secure for frames from small to large, and the wire allows small horizontal adjustments to level the frame on the wall.
What you need
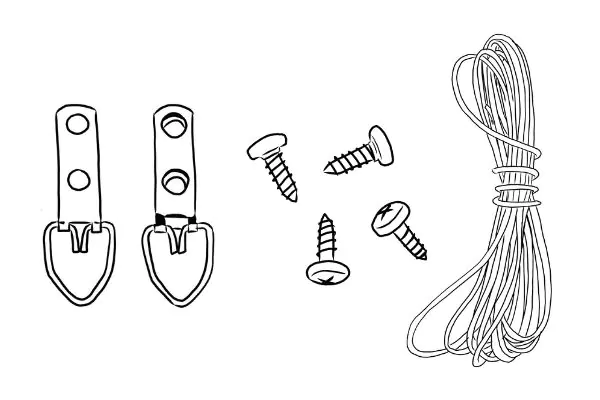
- Two D-rings sized to your frame's weight (small for under 10 lbs, medium for 10-25 lbs, large for 25+ lbs)
- Two screws (Phillips, 3/8 to 1/2 inch length, sized to D-ring holes)
- Picture-hanging wire rated for 1.5x the frame's total weight
- A small drill or screwdriver
- Wire cutters
- A measuring tape and pencil
The installation
-
Lay the frame face-down on a clean, padded surface (a folded blanket on a table works).
-
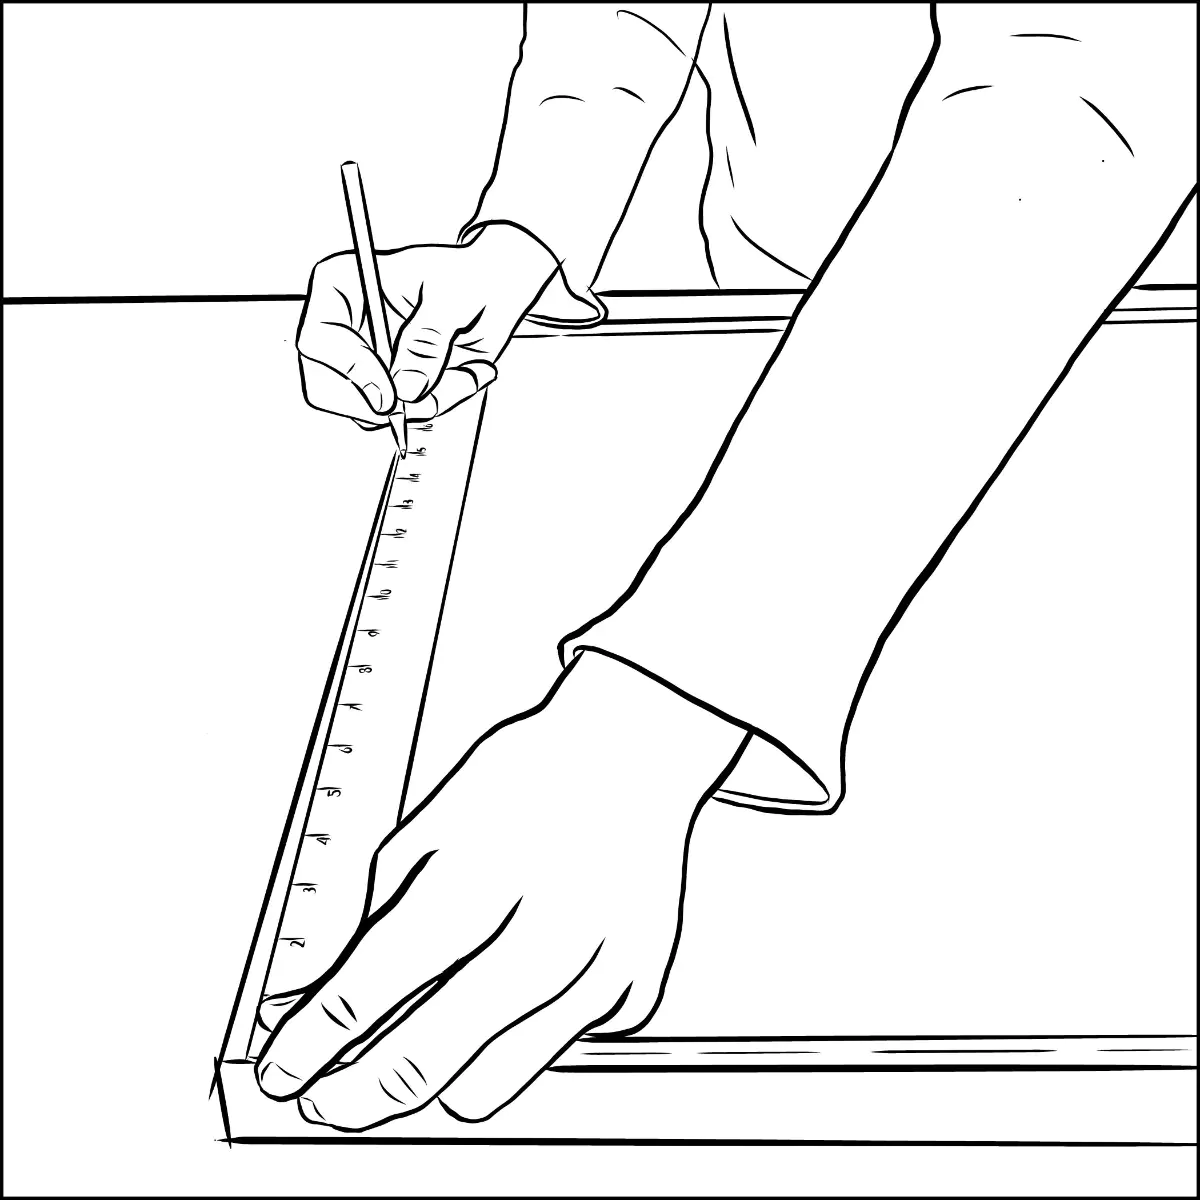
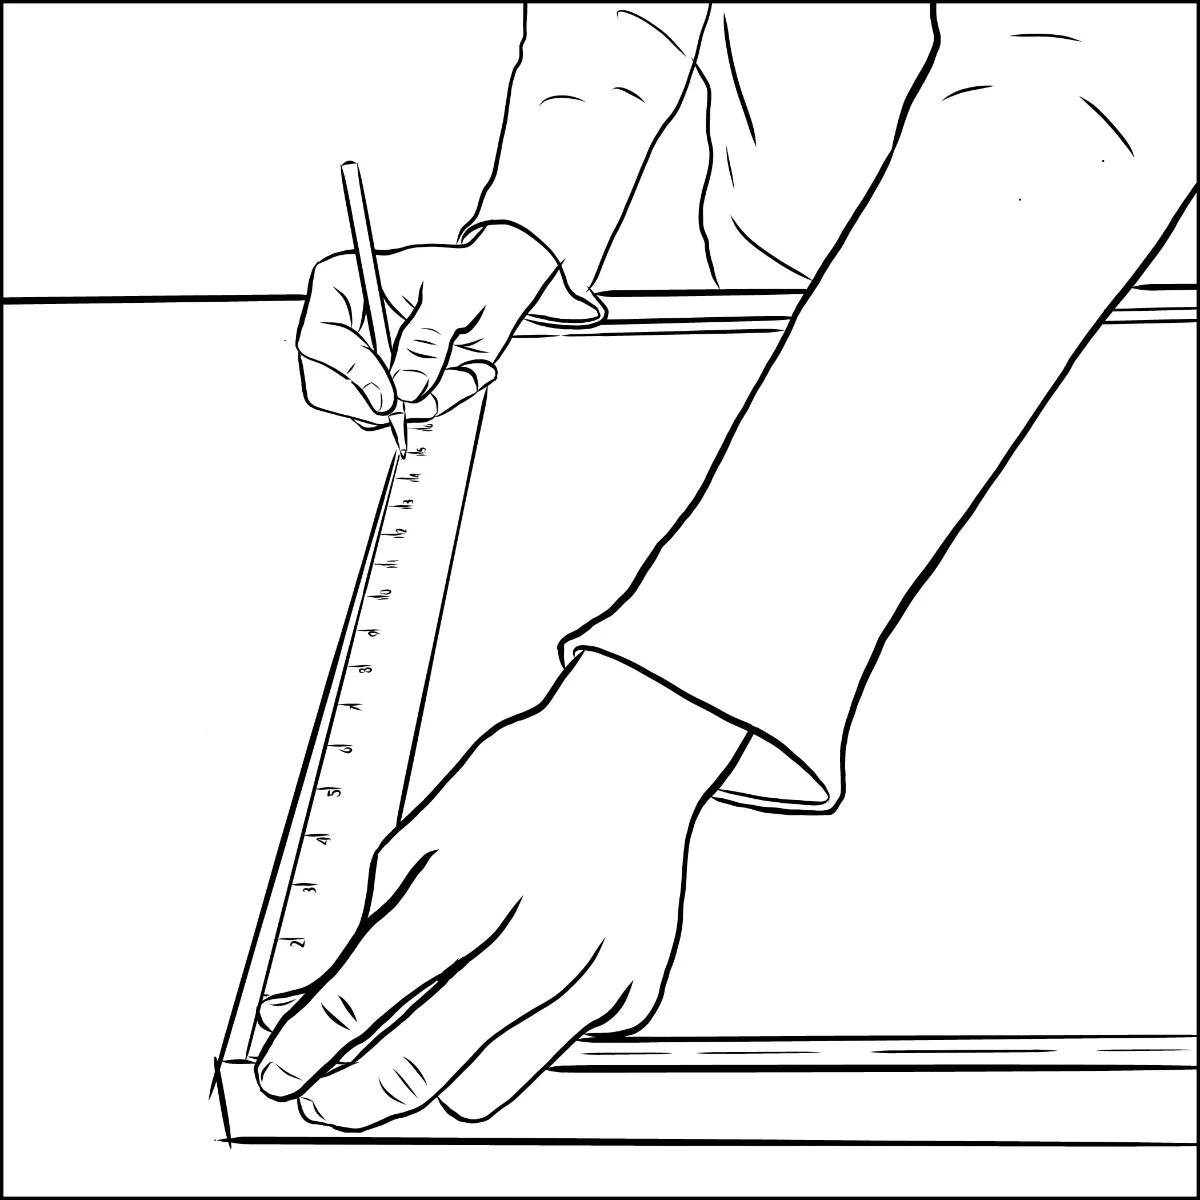
Measure down from the top of the frame about 1/4 to 1/3 of the frame's height. Mark this point on each side of the frame back, equally distant from the side edge (typically 1 to 2 inches in from each side).
-
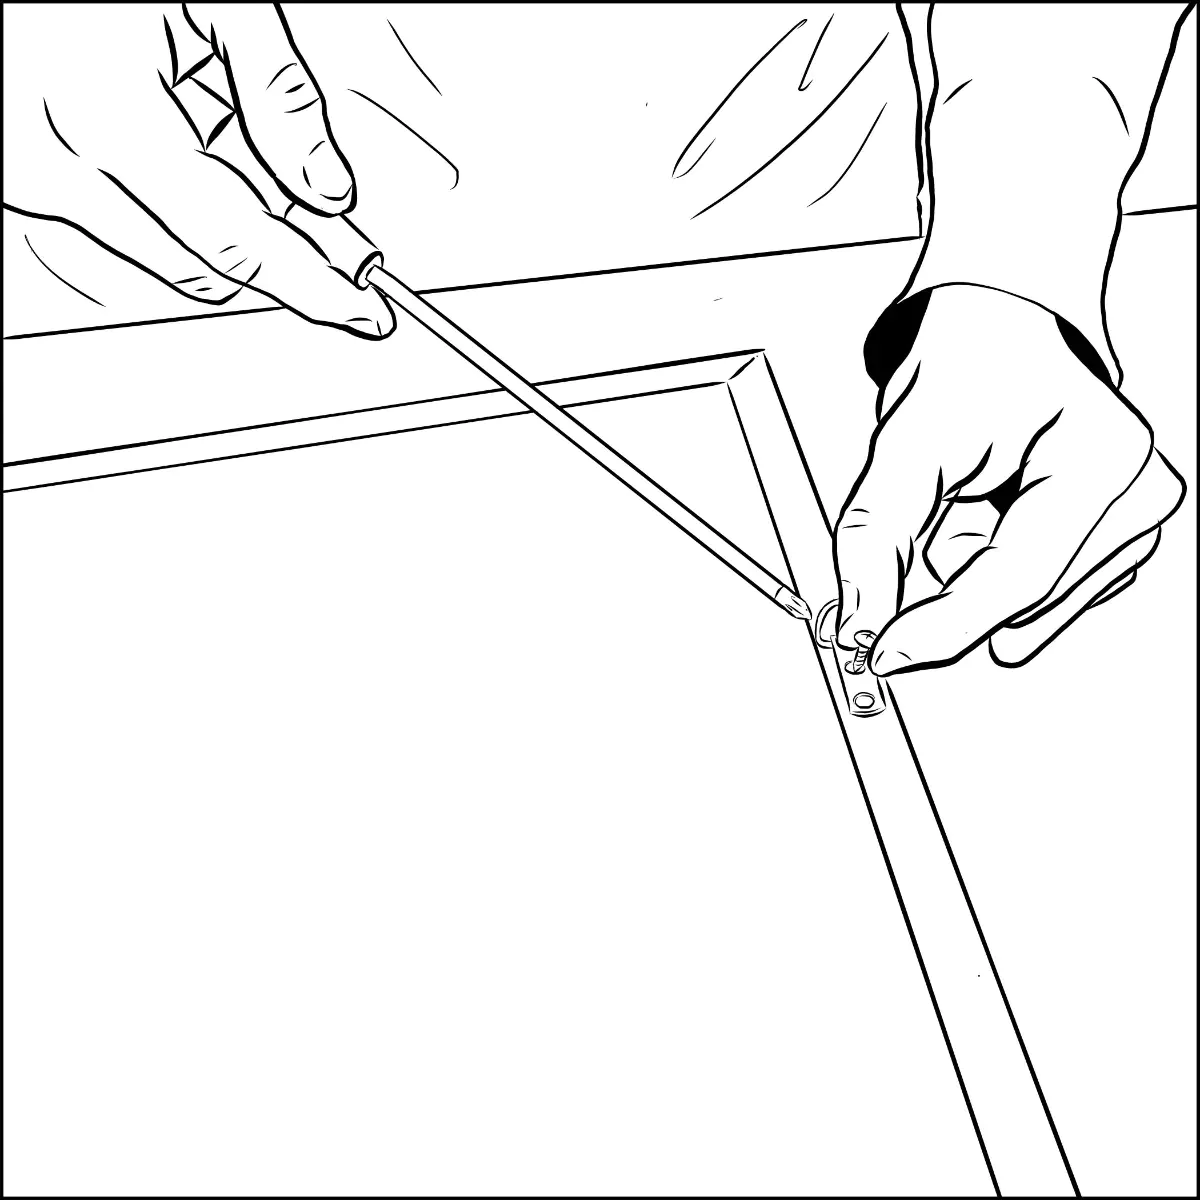
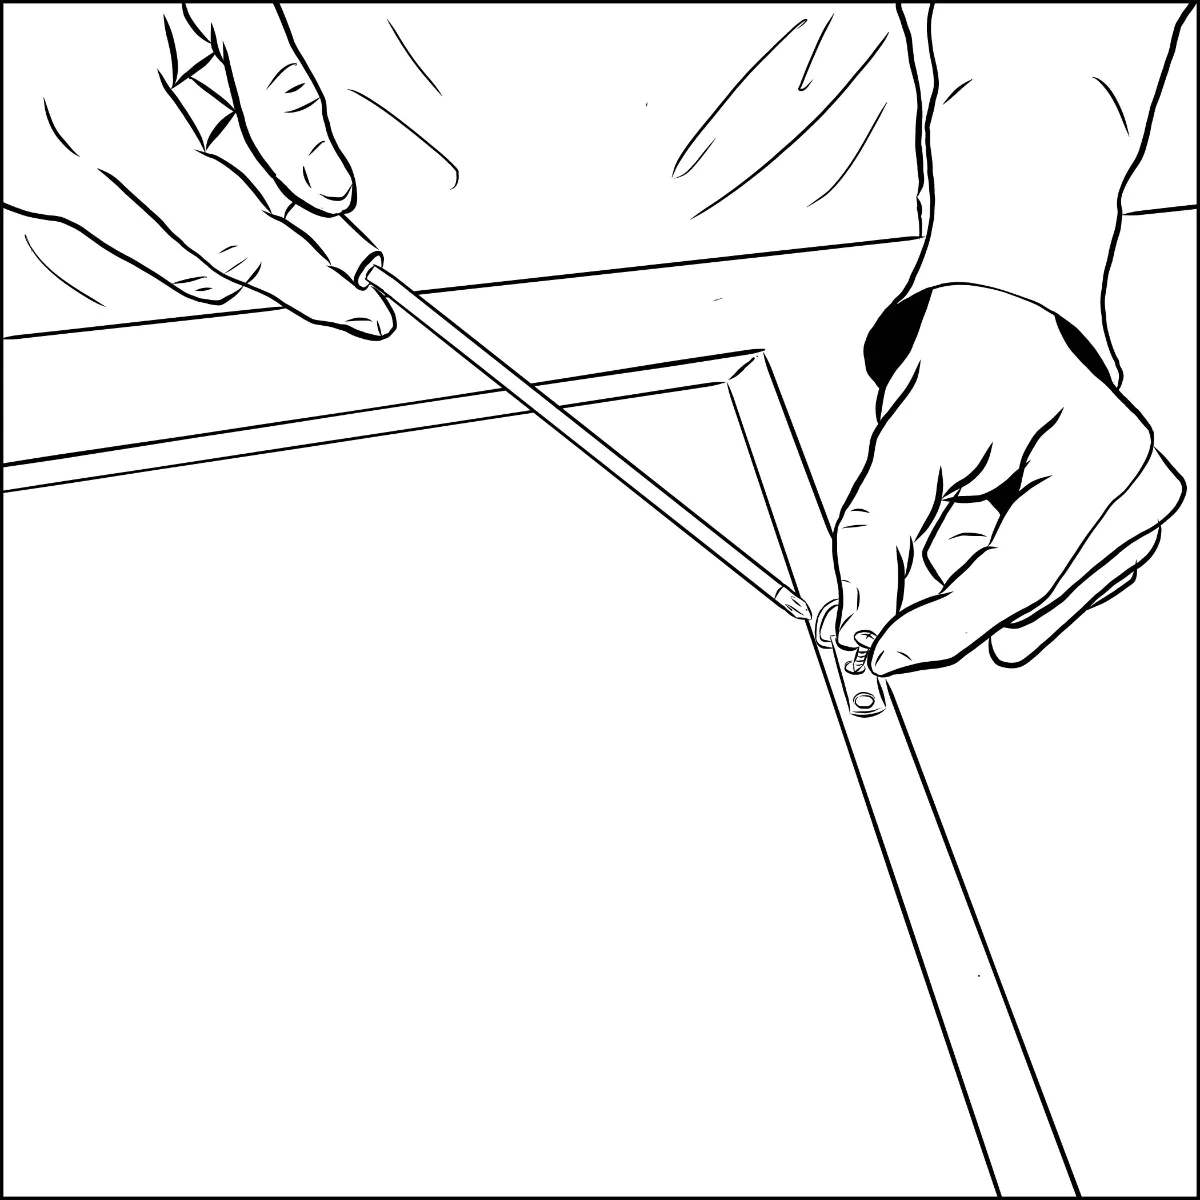
Pre-drill a small pilot hole at each mark with a drill bit slightly smaller than the screw diameter. This prevents the wood from splitting.
-
Position a D-ring at each pilot hole, ring side facing up (so the ring opening points toward the top of the frame). Drive a screw through each D-ring's hole into the pilot hole.
-
Cut a length of picture wire approximately 12 inches longer than the distance between the two D-rings.
-
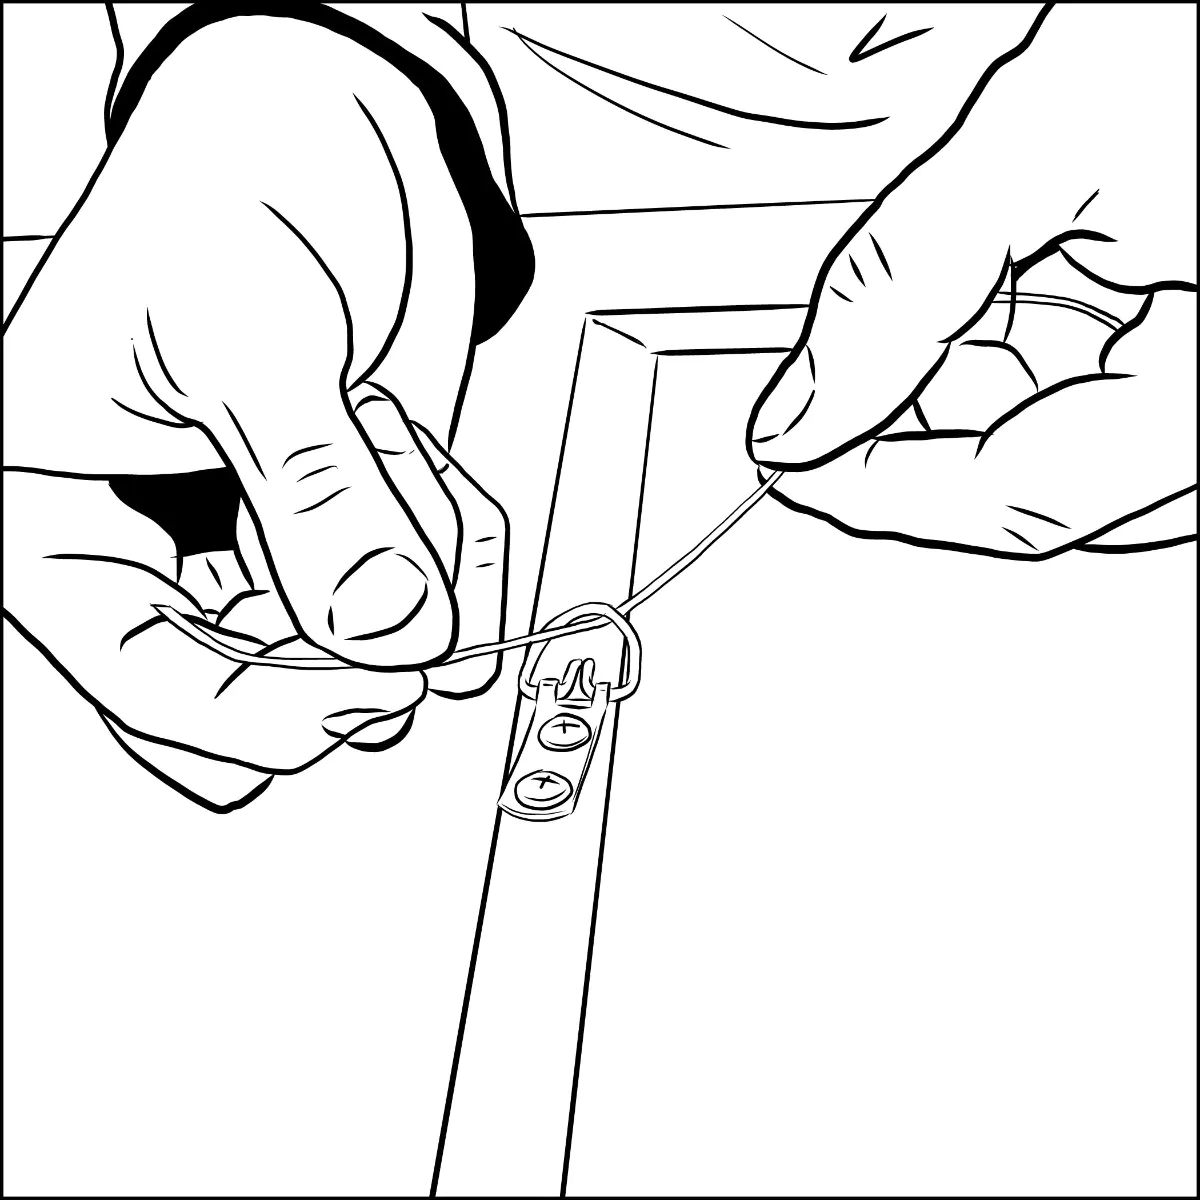
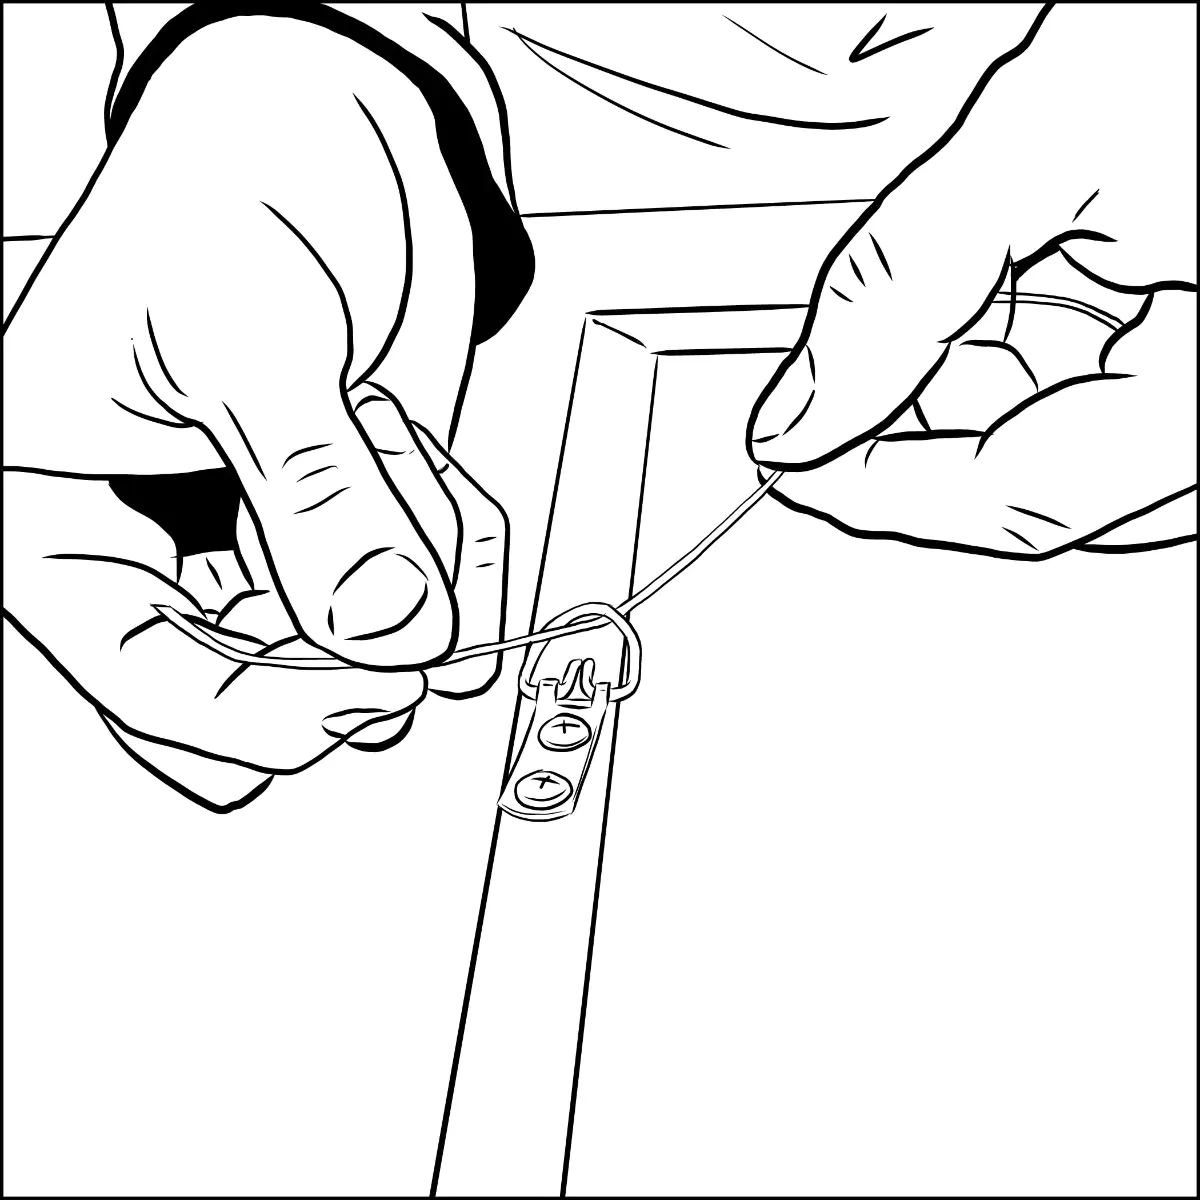
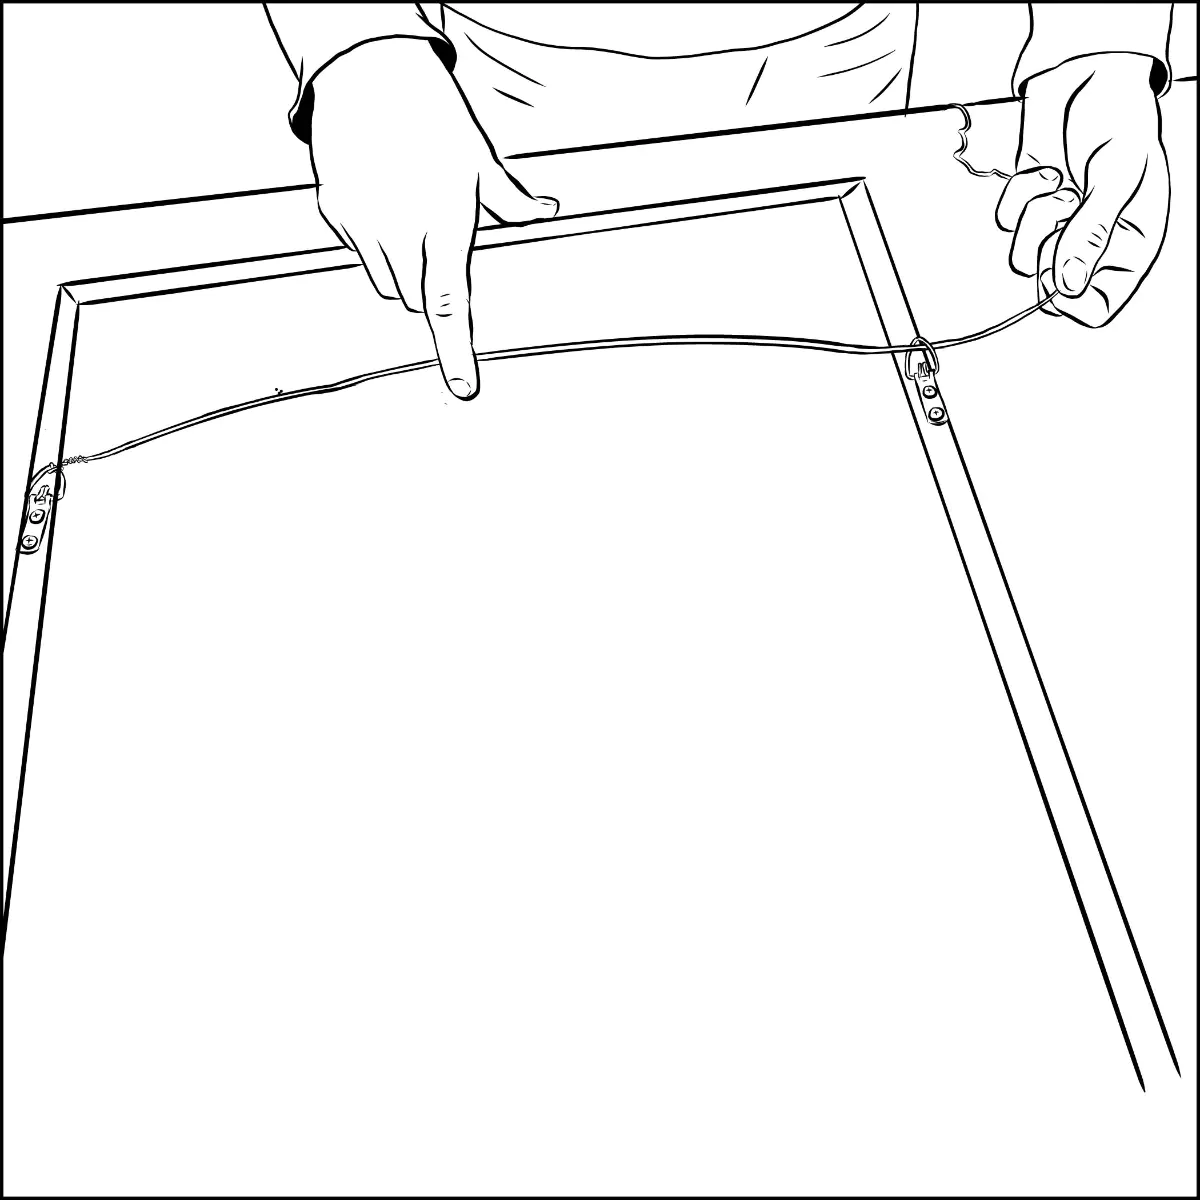
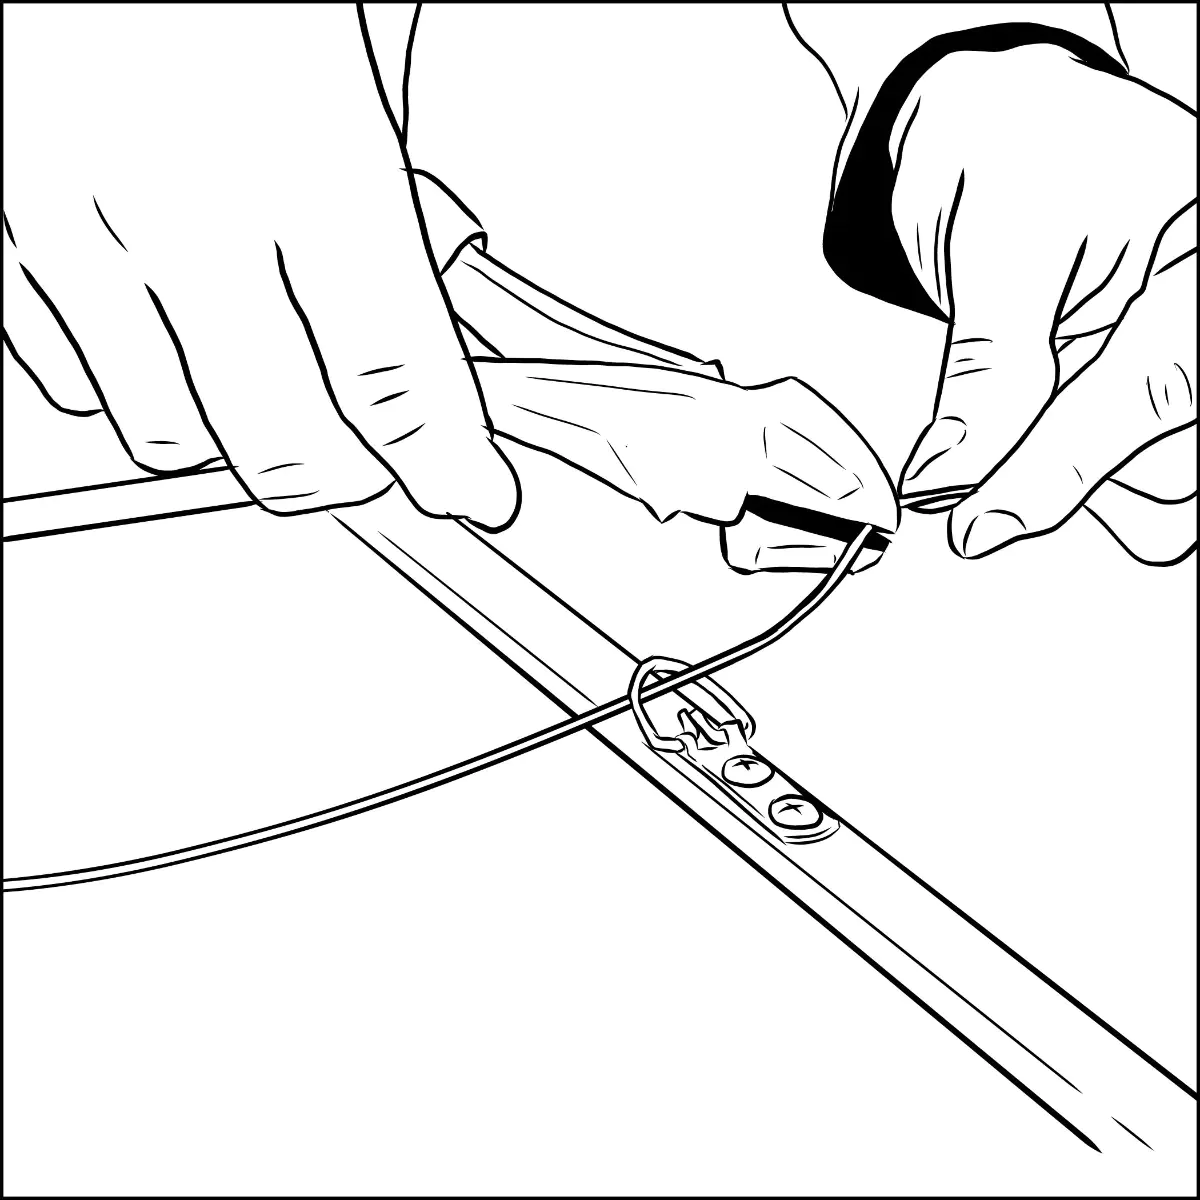
Thread one end of the wire through the first D-ring, leaving about two inches of slack to wrap back on itself.
-
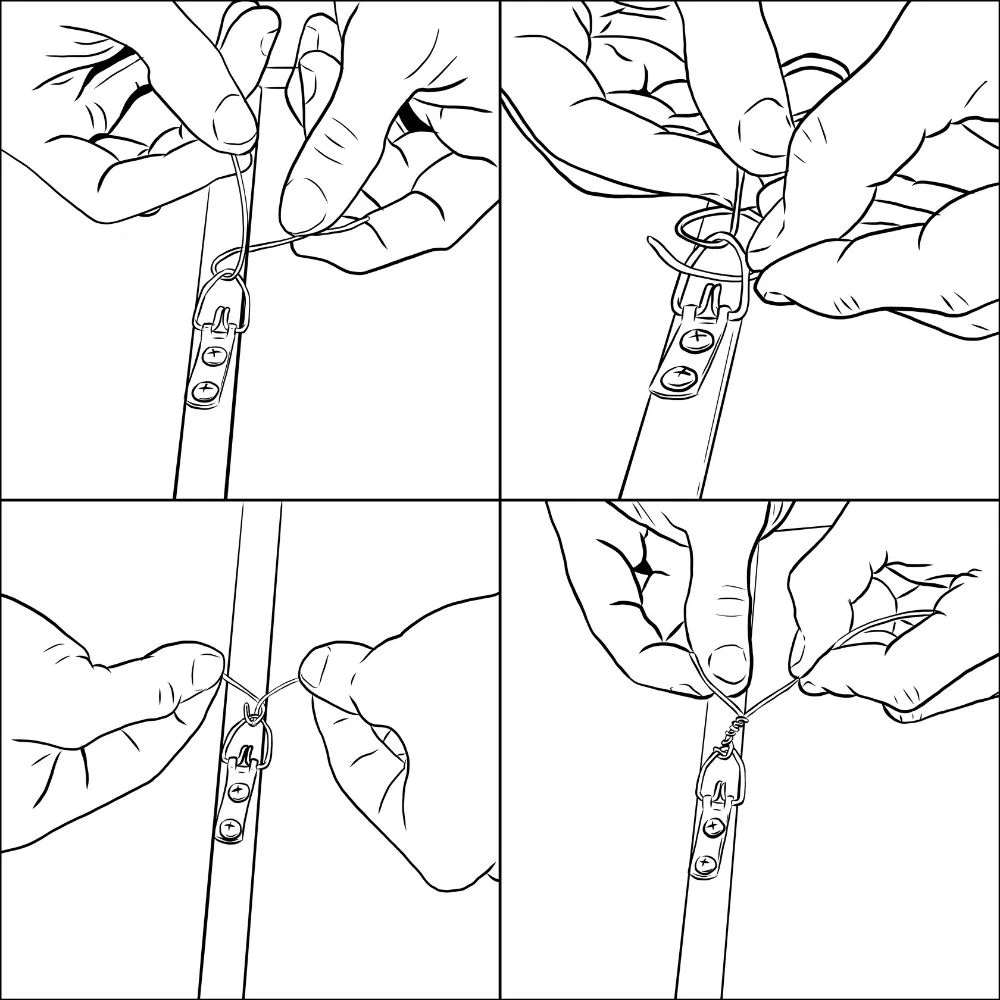
Loop that two-inch tail back through the D-ring a second time, then wrap it around the main wire three to four times to lock it. The diagram below shows the loop-and-wrap pattern.
-
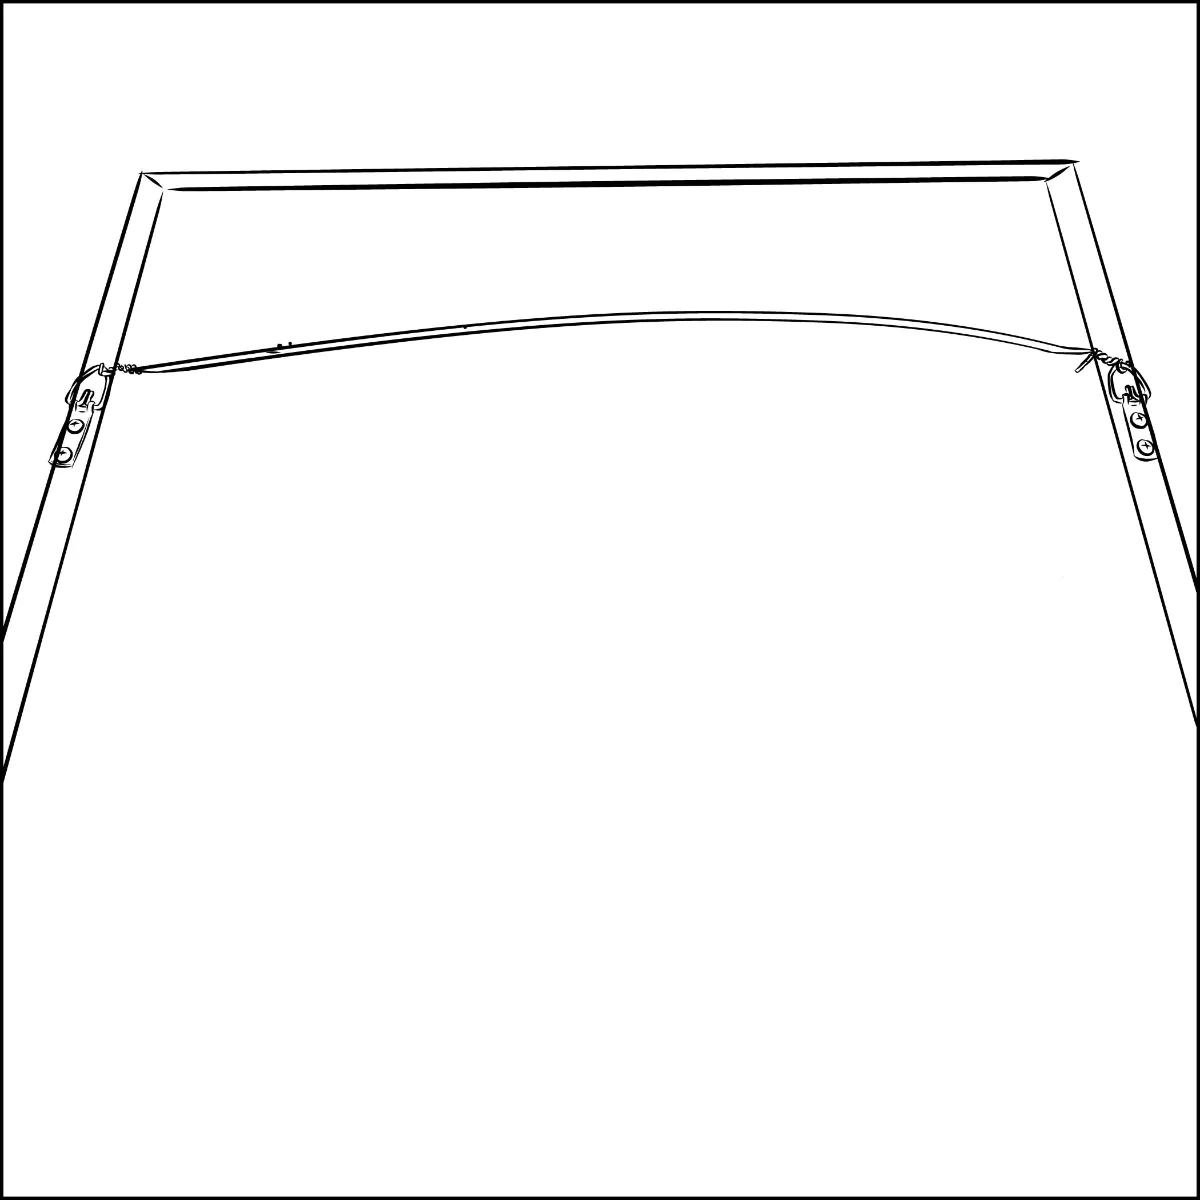
Extend the wire across the back of the frame to the other D-ring, leaving some slack so the wire peak will sit 2 to 3 inches below the top of the frame when hung.
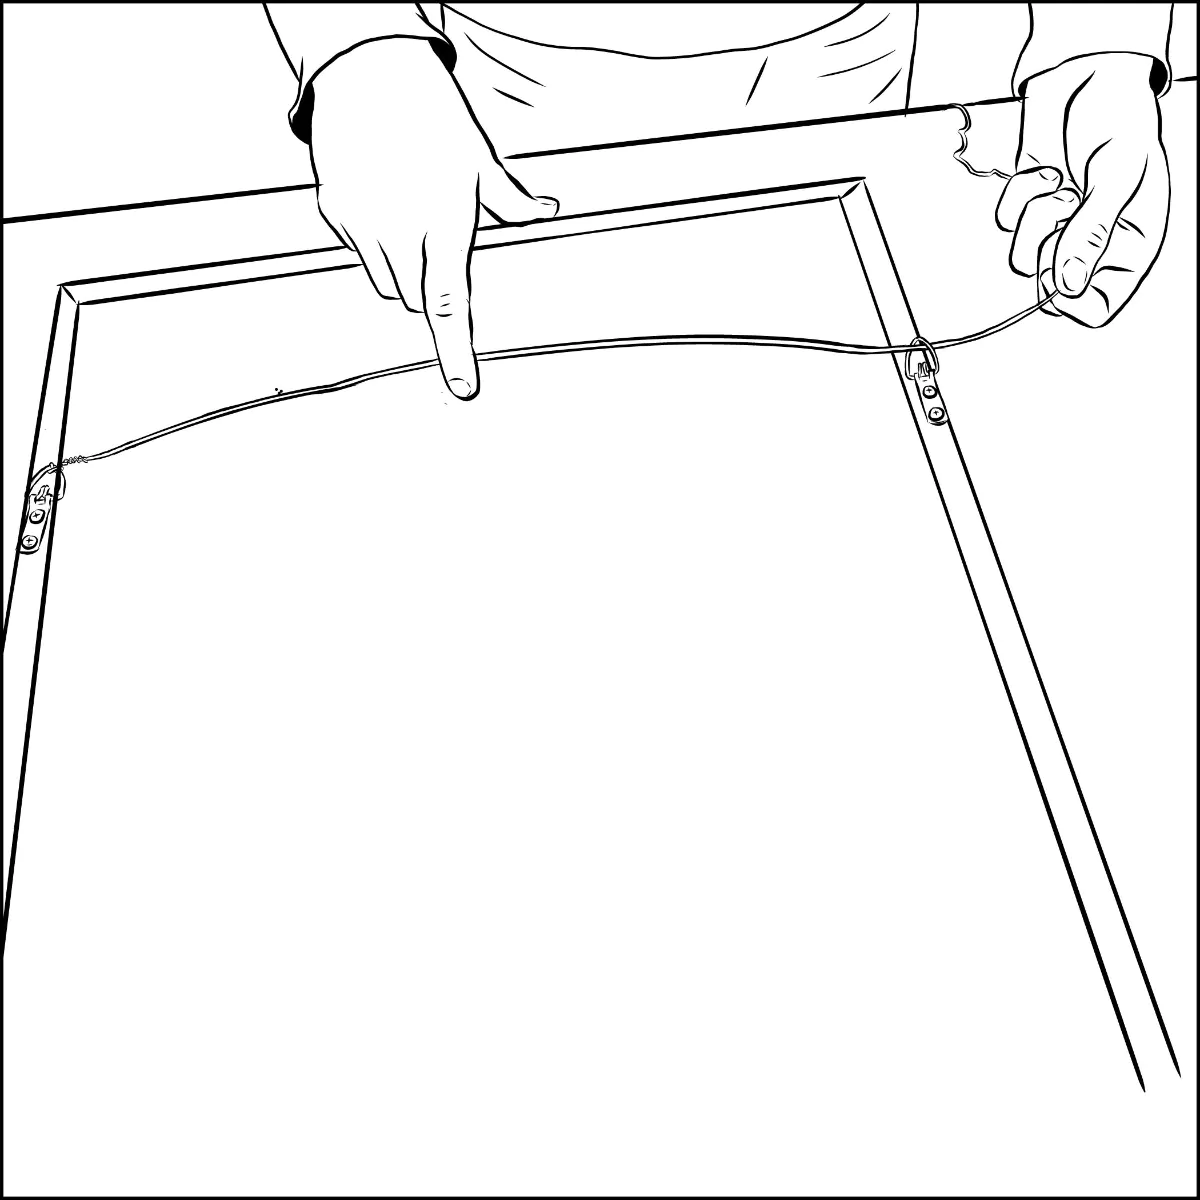
-
Thread the wire through the second D-ring and trim, leaving two inches to secure.
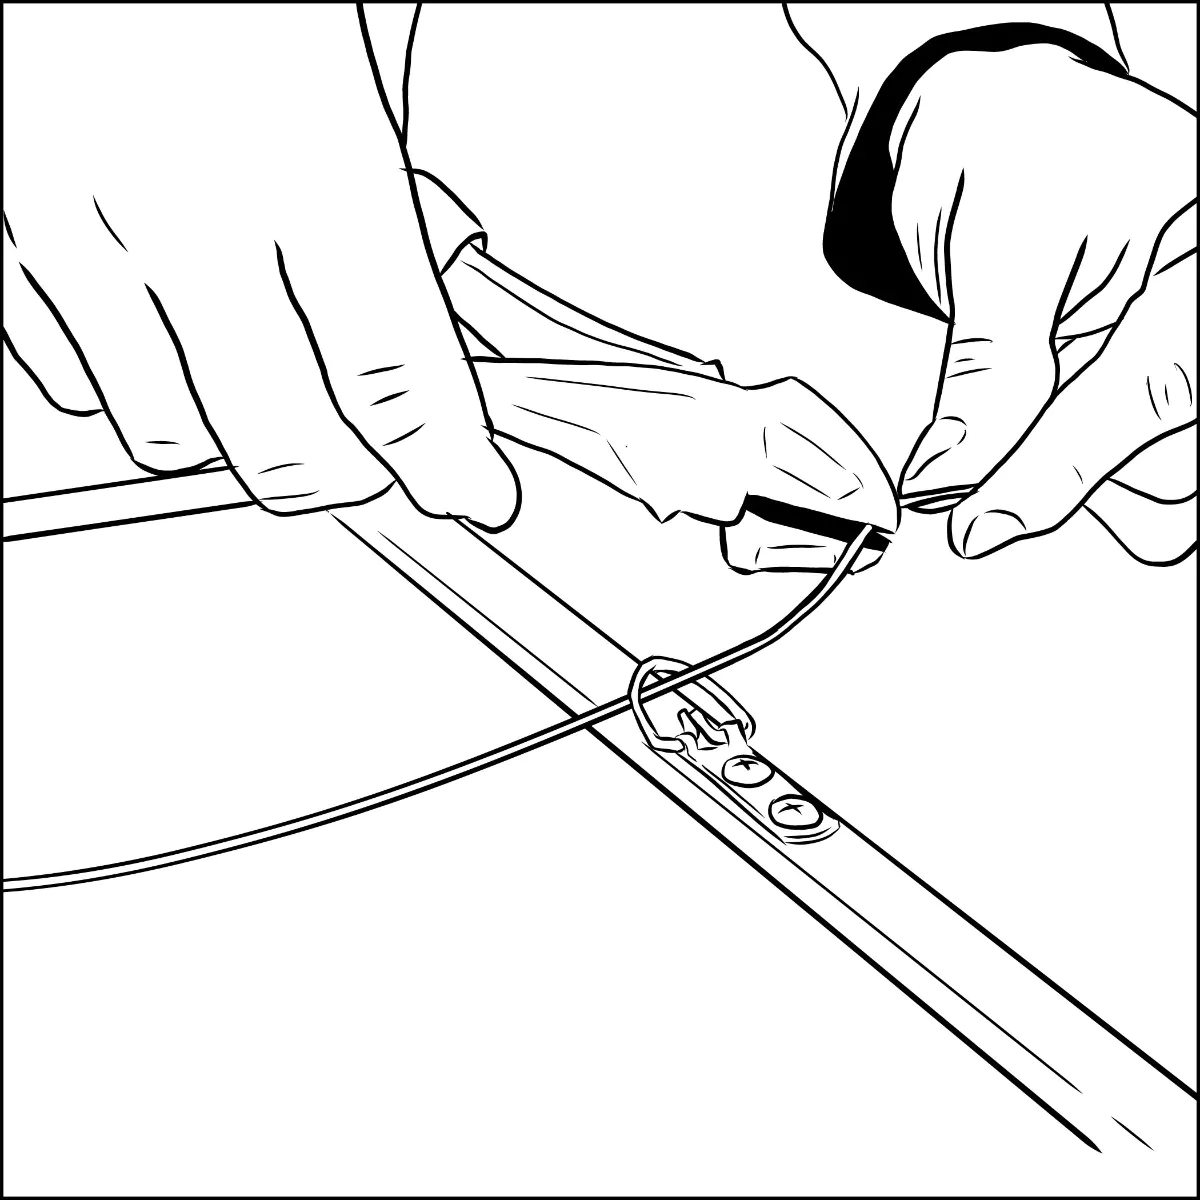
-
Repeat the loop-and-wrap on the second D-ring to lock the wire in place.
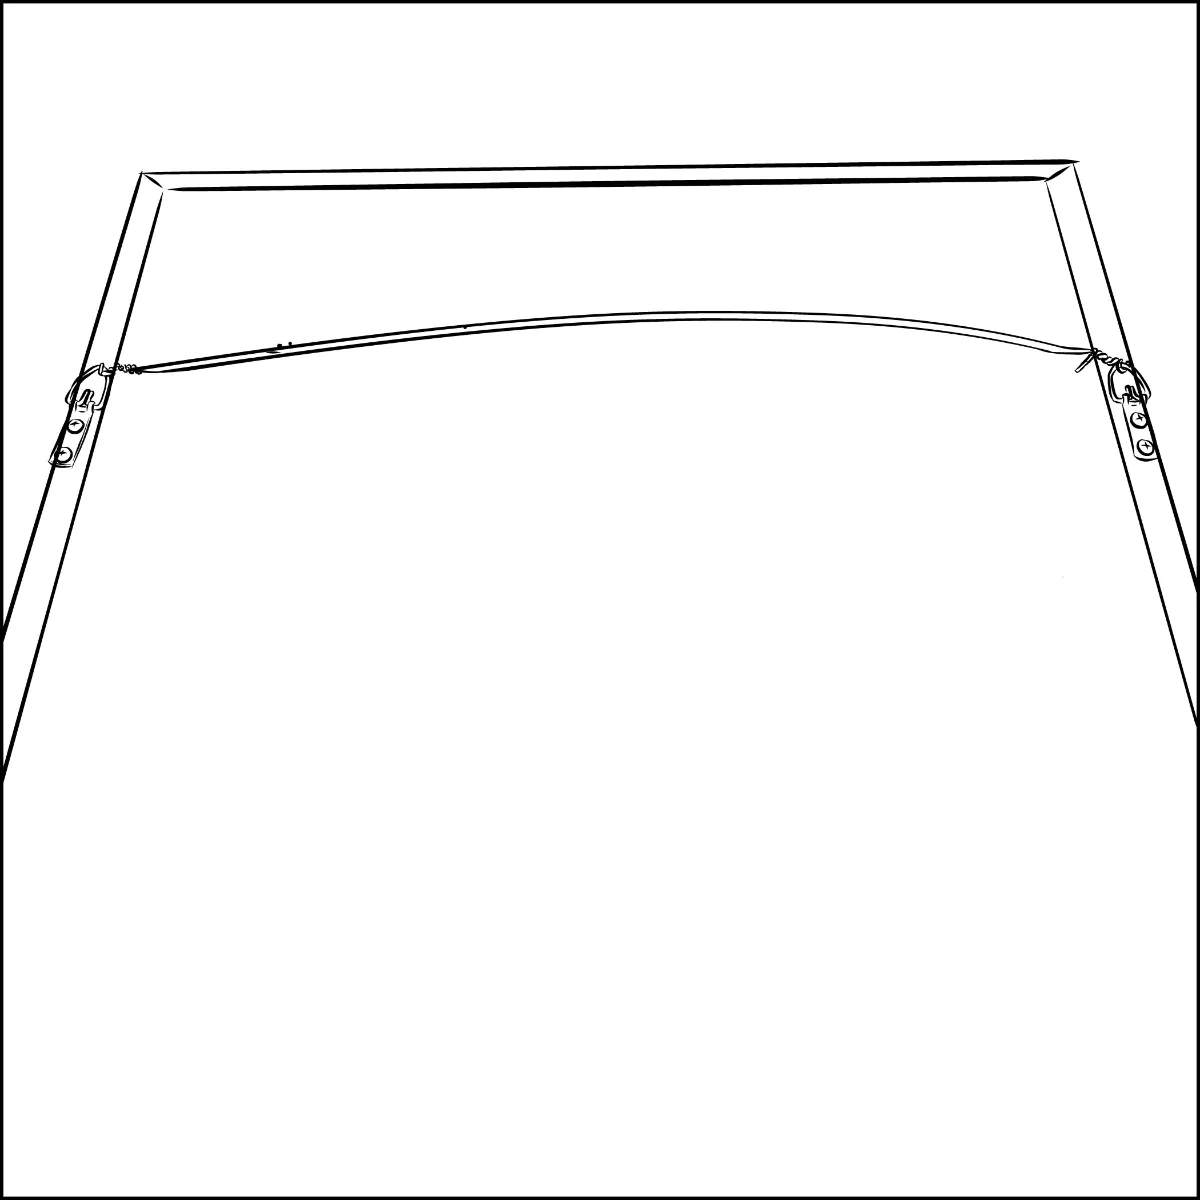
When the frame hangs on a wall hook, the wire should pull taut and the frame should hang level. If it tilts, the D-rings are not at equal height; check the placement.
Common mistakes
- D-rings too high on the frame. The wire ends up close to the top edge, and the frame tilts forward off the wall.
- D-rings too far from the side edges. The wire spans a small distance and creates a tall peak; the frame hangs high above the hook.
- Wire not twisted enough. A single twist or two pulls free under tension. Three to four twists is the standard.
- Wire too tight. No sag means no peak for the hook to catch. The frame slips off.
- Wire too loose. Too much sag means the frame hangs lower than expected.
Installing sawtooth hangers
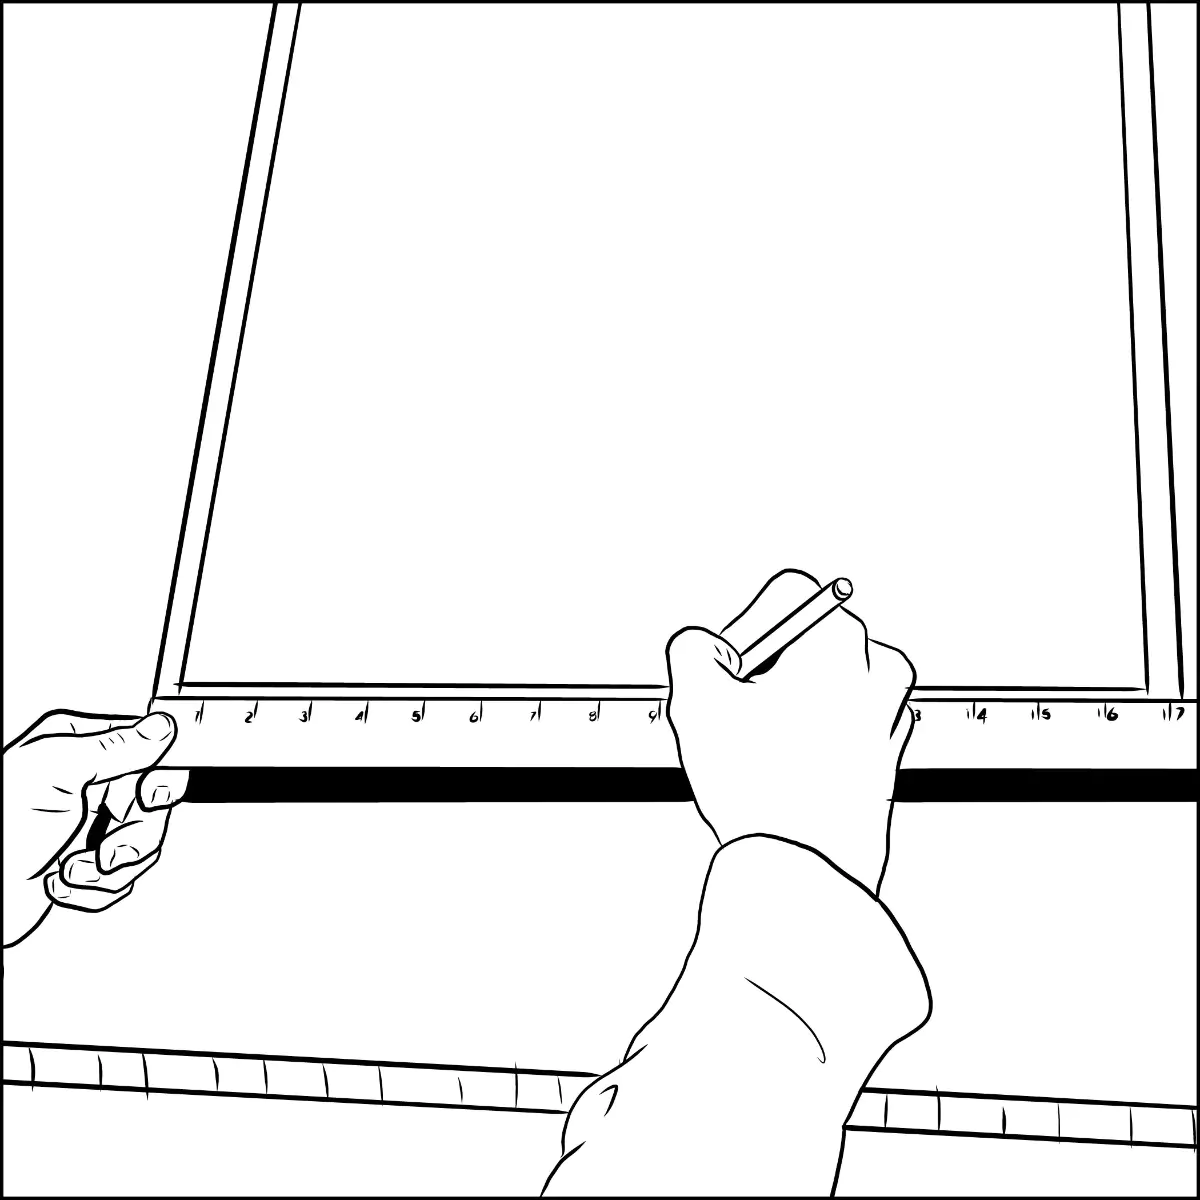
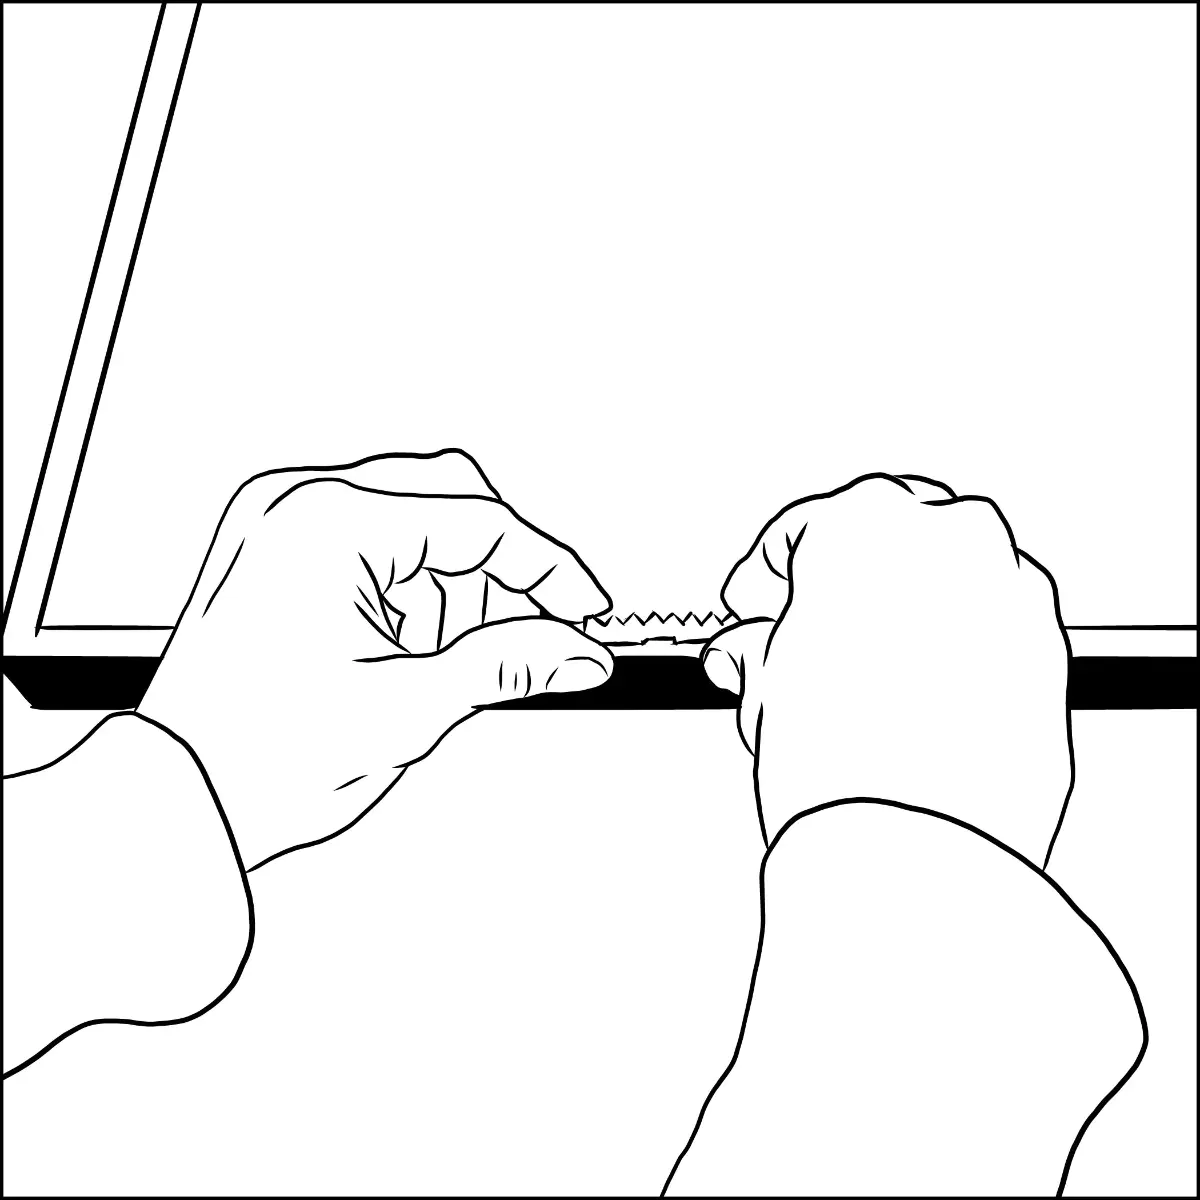
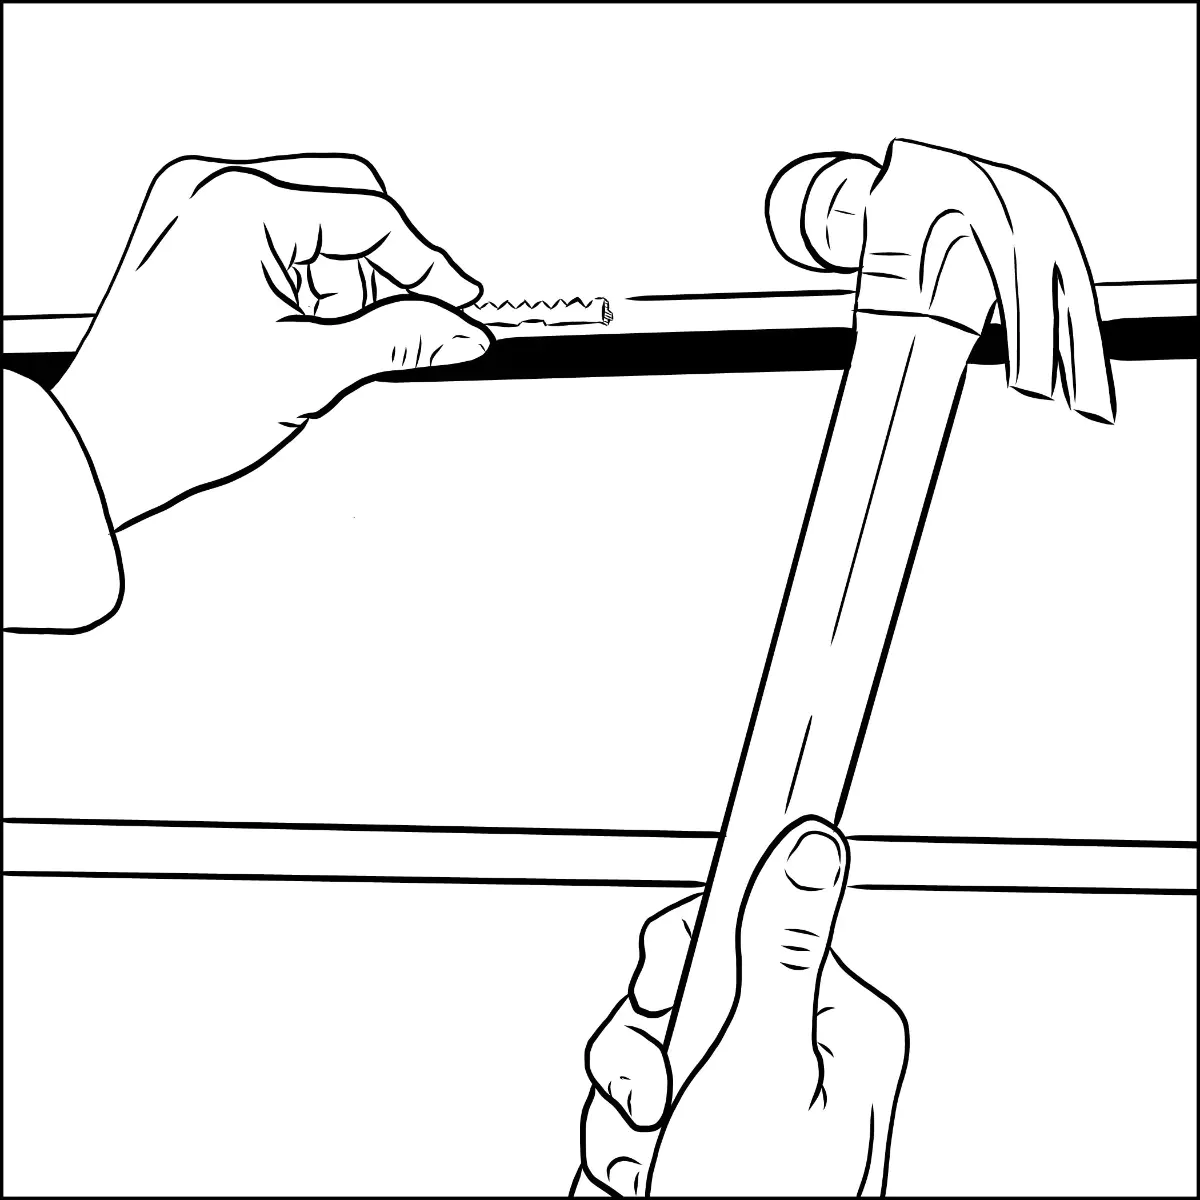
A sawtooth hanger is a small metal strip with serrated teeth along the bottom edge. It mounts to the center of the top rail on the back of the frame, and the frame hangs over a single nail or picture hook in the wall. Best for small, lightweight frames where simplicity matters more than precision.
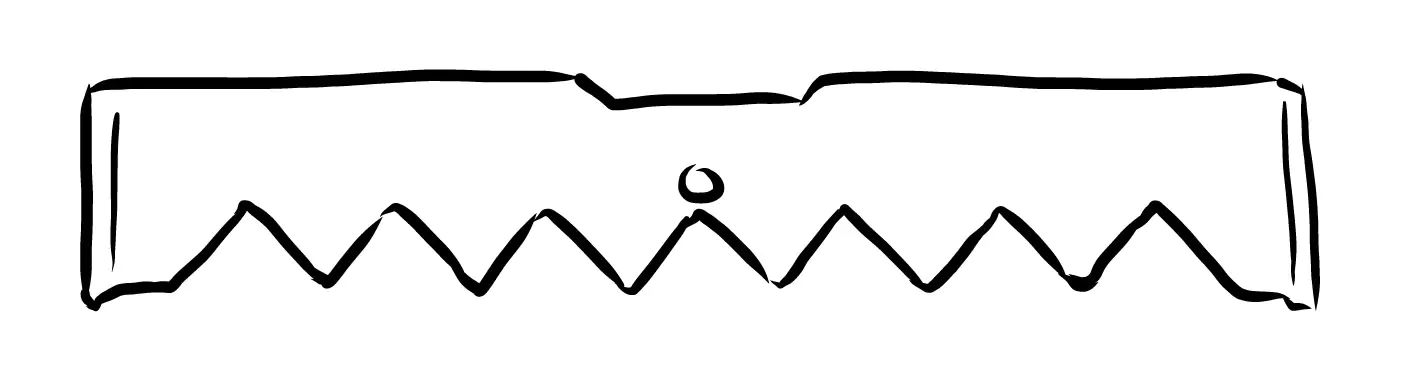
What you need
- One sawtooth hanger sized to your frame
- Two small screws (Phillips, 1/4 to 3/8 inch length) or the small finishing nails that often ship with sawtooth hangers
- A small drill or screwdriver, plus a hammer if your hardware uses nail prongs
- A measuring tape and pencil
The installation
-
Lay the frame face-down.
-
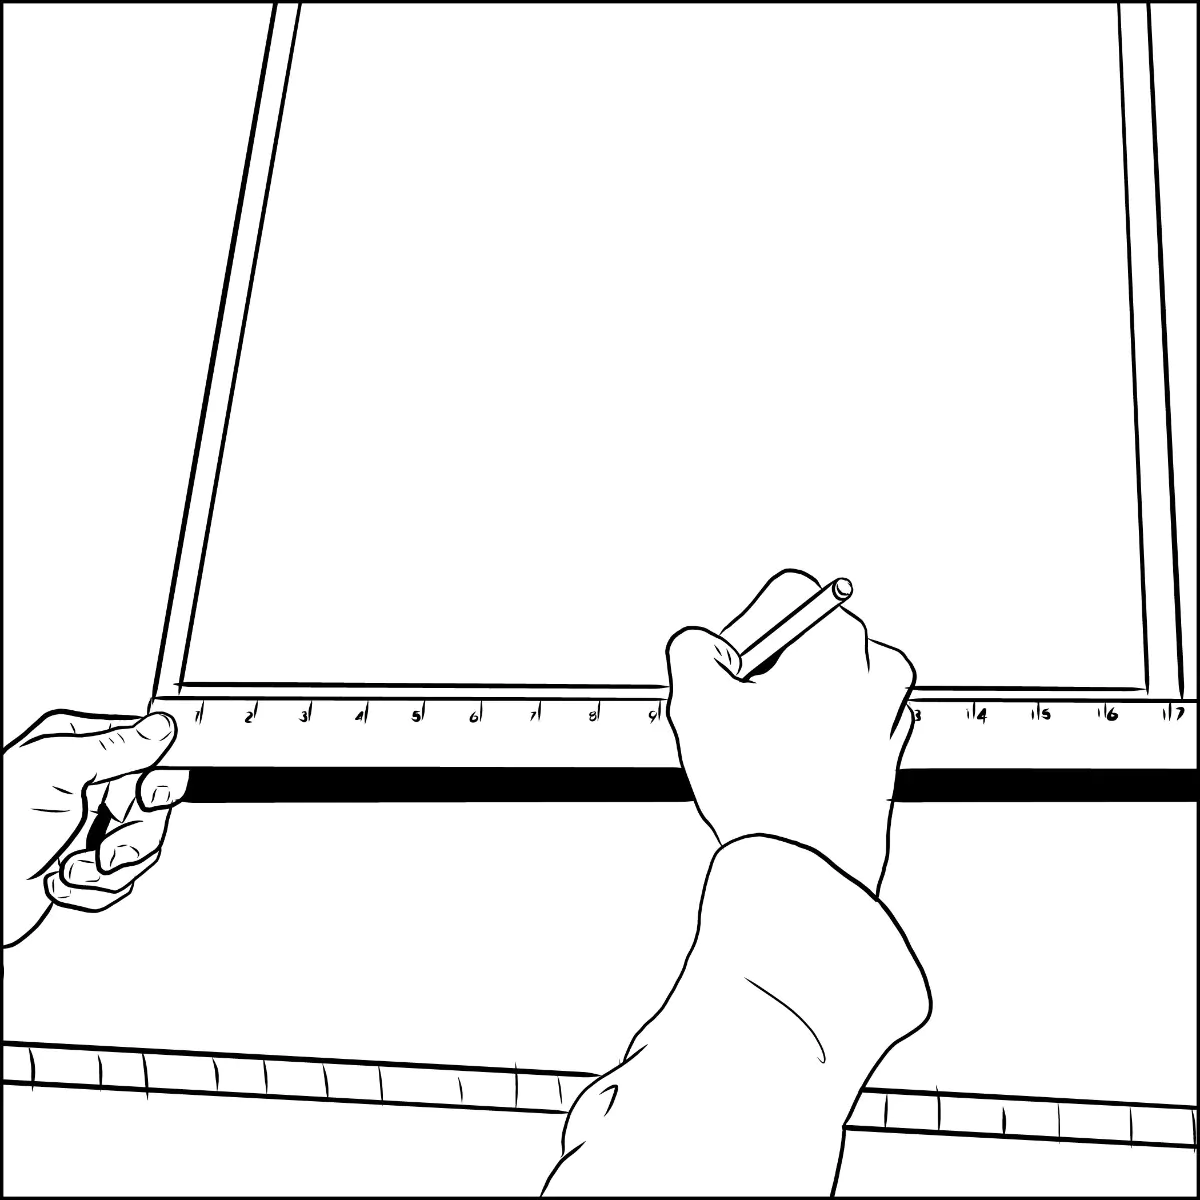
Find the exact center of the top rail of the frame back (measure from each edge to confirm).
-
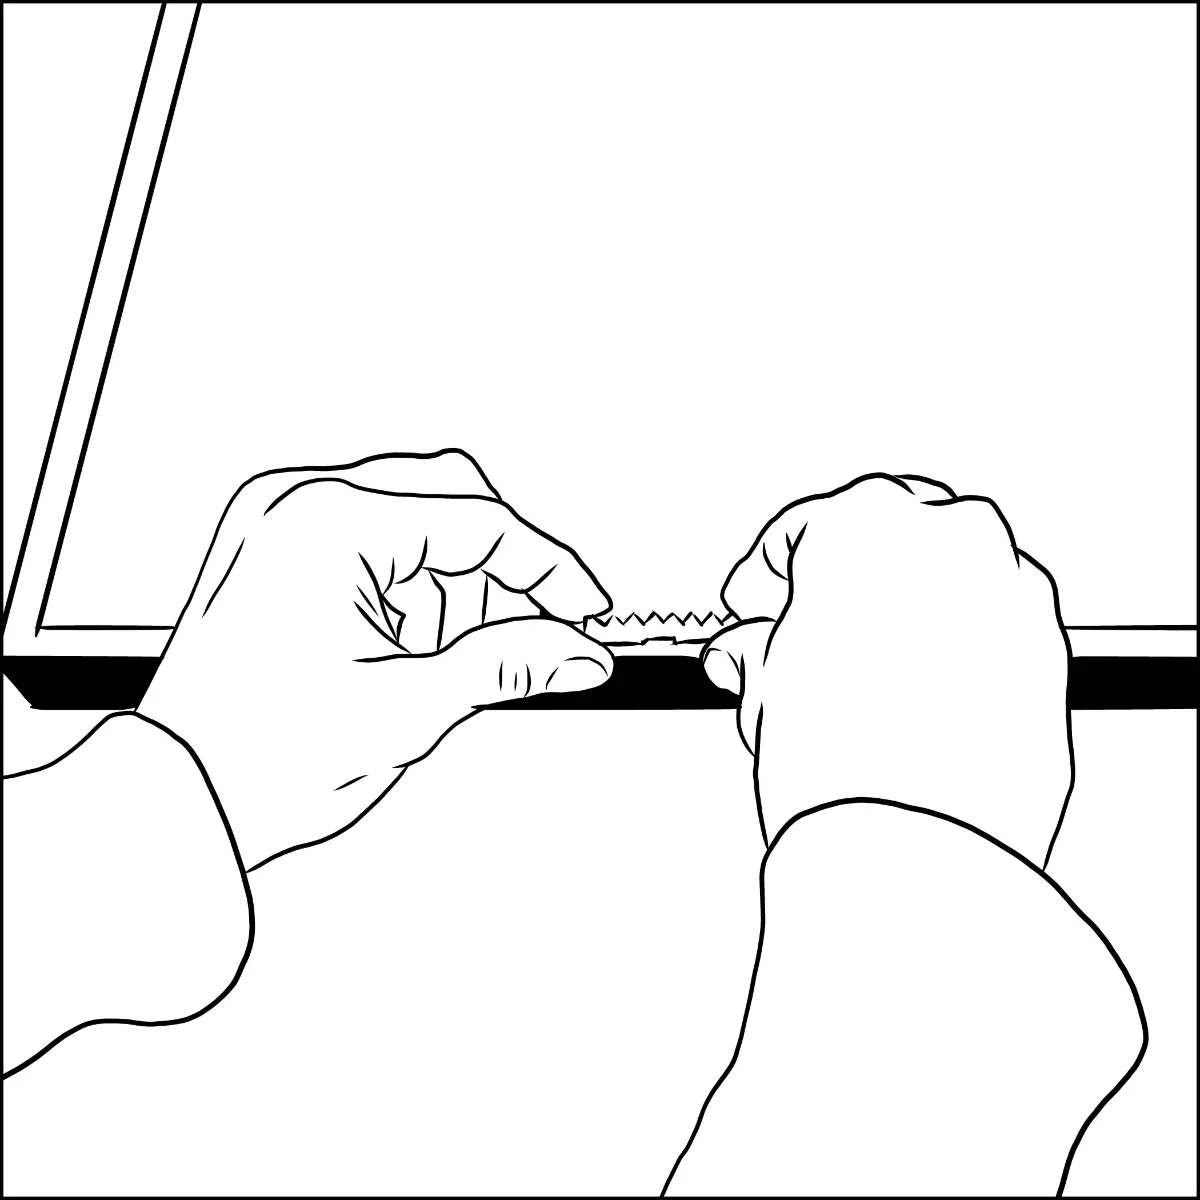
Position the sawtooth hanger horizontally at the center of the top rail, about 1/2 inch from the top edge, with the teeth facing down toward the bottom of the frame.
-
Pre-drill two small pilot holes through the sawtooth's screw holes (skip this step if your hardware uses nail prongs).
-
Drive a screw through each hole into the pilot hole, or lightly tap the nail prongs in with a hammer until the hanger is flush against the frame.
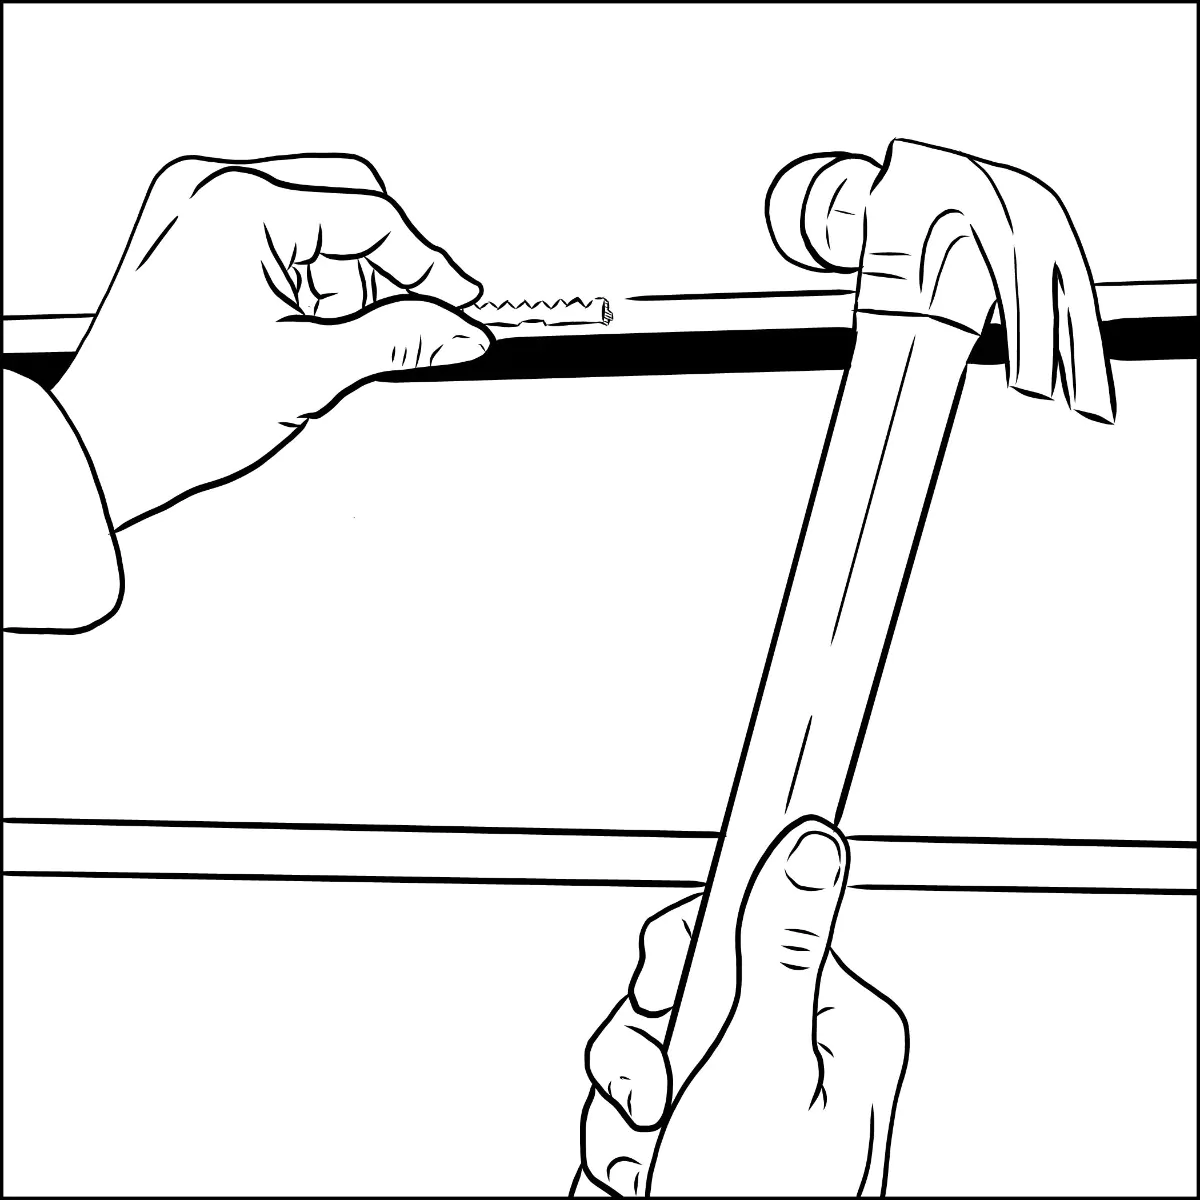
The frame now hangs on a single nail or picture hook in the wall, catching on the teeth of the sawtooth. To level the frame, lift it slightly off the nail and shift left or right; the teeth allow small horizontal adjustments.
Sawtooth hangers are simple but only suitable for light frames. For anything over 5 pounds, D-rings with wire is more secure.
Installing two-point hangers

What you need
- Two two-point hangers (also called keyhole hangers)
- Four screws (Phillips, 1/2 inch length)
- A drill with a small bit
- A measuring tape and level
- Two screws or nails for the wall
The installation
- Lay the frame face-down.
- Measure across the back of the frame and mark two equal points, typically 6 to 12 inches apart on a medium frame, equidistant from the center.
- Pre-drill pilot holes at each mark.
- Position a two-point hanger at each mark, the slot opening pointing down (toward the bottom of the frame).
- Drive screws through each hanger's holes into the pilot holes.
To hang the frame, install two screws or nails on the wall, spaced exactly the same distance apart as the hangers, level with each other. Slip the frame's hangers down over the wall screws. The frame hangs flush.
Two-point hangers eliminate the wire and prevent the frame from tilting. The downside is that small leveling adjustments are harder; the frame is at the height the wall screws set.
Installing a French cleat
What you need
- A French cleat kit (two interlocking pieces, often aluminum or steel)
- Screws sized for both the wall side and the frame side
- A drill
- A level
- Wall anchors (if the wall is drywall without studs)
The installation
- Mount one half of the cleat horizontally on the wall, at the height where the top of the frame should sit. Use a level. Drive screws into wall studs if possible; into wall anchors if not. Heavy frames require studs or heavy-duty anchors, no exceptions.
- Lay the frame face-down. Mount the other half of the cleat horizontally on the back of the frame, near the top, equidistant from each side edge.
- To hang, lift the frame and engage the frame-side cleat onto the wall-side cleat. The two pieces interlock and the frame settles flush against the wall.
French cleats hold significant weight (50+ pounds with proper installation) and prevent the frame from being knocked off the wall easily. They are the standard for shadow boxes, large canvases, and any frame in a high-traffic area.
Choosing the right wall hook
The wall hook is just as important as the frame hardware. The hook's weight rating must match or exceed the frame's total weight.
Standard picture-hanging hooks (the small brass-finished triangular type) are rated for 5 to 30 pounds depending on the model. Read the package; do not guess.
Heavy-duty wall hooks for frames over 30 pounds use larger nails or wall anchors. Check the rating.
Drywall anchors are required when the frame cannot be hung from a stud. Toggle bolts, plastic anchors, and self-drilling anchors all work. Match the rating to the load.
Stud-mounted screws are the strongest option. Find the studs with a stud finder (typical spacing is 16 inches on center). Frames mounted to studs can hold heavy weight.
For frames over 25 pounds, hang from a stud or use heavy-duty anchors. Drywall alone cannot reliably hold frames that heavy.
Frequently asked questions
Can I use D-rings on the back of a canvas frame?
Yes, if the frame has a wood back rail thick enough to hold the screws. Most canvas float frames and traditional canvas frames are built with this in mind. For very thin canvas wraps, a French cleat or small two-point hangers may be more secure.
Do I need to use the hardware that came with the frame?
Usually yes. Picture frames are typically built with the right hardware for the frame's weight. If you are reframing or building your own, choose hardware matched to the frame's total weight.
What is the difference between picture wire and braided wire?
Standard picture wire is twisted multi-strand metal. Braided picture wire is constructed differently and is rated for higher weights (sometimes called "heavy duty" or "professional grade"). Use braided for frames over 25 pounds.
How high should I hang the frame?
The standard rule is that the center of the artwork should be at eye level, which is approximately 57 inches from the floor for an average viewer. For multi-frame installations, calculate the eye-level center first and arrange around it.
What if my wall is plaster, brick, or stone?
Each material requires different anchors. Plaster works similarly to drywall but requires careful pilot drilling to avoid cracking. Brick and stone require masonry anchors and a drill with a masonry bit. Concrete walls need concrete anchors. The frame hardware itself does not change; only the wall-side mounting hardware.
Can I add hardware to an existing frame that has none?
Yes. The frame back can be drilled and hardware installed using the methods above. If the frame is delicate or antique, this should be done by a framer to avoid splitting the wood.